
The Shakkei Pavilion is one of the most popular locations in Fortnite Battle Royale. Located near the center of the map, it offers plenty of space to build, and has some great loot. However, you cannot reach the pavilion without unlocking it first. In this guide, we are going to show you how to unlock the Shakkei Pavilion location in Fortnite Battle Royal.
How to Get There:
1. Head over to the map and look for the blue building located in the middle of the island.
2. Once there, use the crosshair to target the building.
3. When you do, the building will start flashing red. This indicates that someone else is already inside the building.
4. If you want to enter the building, wait until the person leaves, then quickly tap Enter to open the door.
5. You can now access the Shakkei Pavilion. Now, let’s see what items you can find inside…
The event will begin on August 31st and end on September 3rd.
To participate, you must be level 15 or above.
You must complete the following conditions to unlock the Shakkei Pavilion location:
1. Complete the “Newbie Adventurer” quest.
2. Defeat the boss monsters within the Shakkei Pavilion.
3. Clear the daily quests.
4. Use the Shakkei Pavilion item.
Shakkei Pavilion Domain Location
The Inazuma region contains several domains. One of those is Shakkei Pavilion. This is a treasure domain located inside the region. To find it you must solve a puzzle. You can do this by clicking on the picture above.
1. Clear World Quest Tatara Tales
Shakkei Pavilion is one of the most iconic locations in Final Fantasy XV. The game features a number of different areas, including the main story area, which requires you to clear out a horde of monsters called Tataras. In order to do this, you’ll need to collect the Kamuijima cannon, which is located within the Tatara Tales world quest. This quest unlocks the Kamuijima canon once it’s been cleared.
The Tatara Tales World Quest is one of several quests that are scattered throughout the map. To start the quest, simply talk to the NPC named Shirogane Muneo who is standing next to the Kamuijima Canon. He’ll give you the task of clearing out the Tatara Ruins. There are three stages to this quest, each containing a set amount of enemies. After completing the final stage, you’ll receive the Kamuijima Canons.
Once you’ve collected the Kamuijima cannons, head over to the Shakkei Pavilion and activate it to gain access to the rest of the area. Once inside, explore the pavilion and take note of where the Kamuijima Cannons are located. These can be found in four different spots around the room.
After collecting all four pieces, return to Shirogane Muneso and he’ll tell you that you’re ready to enter the palace. Head into the palace and follow him down the stairs to the Kamuijimai Cannons. Activate the first piece and watch the scene play out. When the cutscene ends, you’ll be able to see the second piece. Repeat the process to collect the remaining pieces and open up the door leading to the rest of the Shakkei Pavilion.
2. Teleport To The South Cannon
The second part of our quest in Tatara Tales World Quests involves teleporting yourself to the south cannon. This is done by following the instructions given in the video below.
After you teleport there, you will receive a notification saying “You’ve arrived.”
Now you are ready to complete the quest.
Note: You must be level 10 to do this quest.
3. Use The Cannon To Destroy Stone Rubble
The cannon is located near the entrance to the cave where the quest begins. You must destroy the stone rubble blocking the way out of the cave. This requires a lot of precision aiming; aim too high or low and it won’t work.
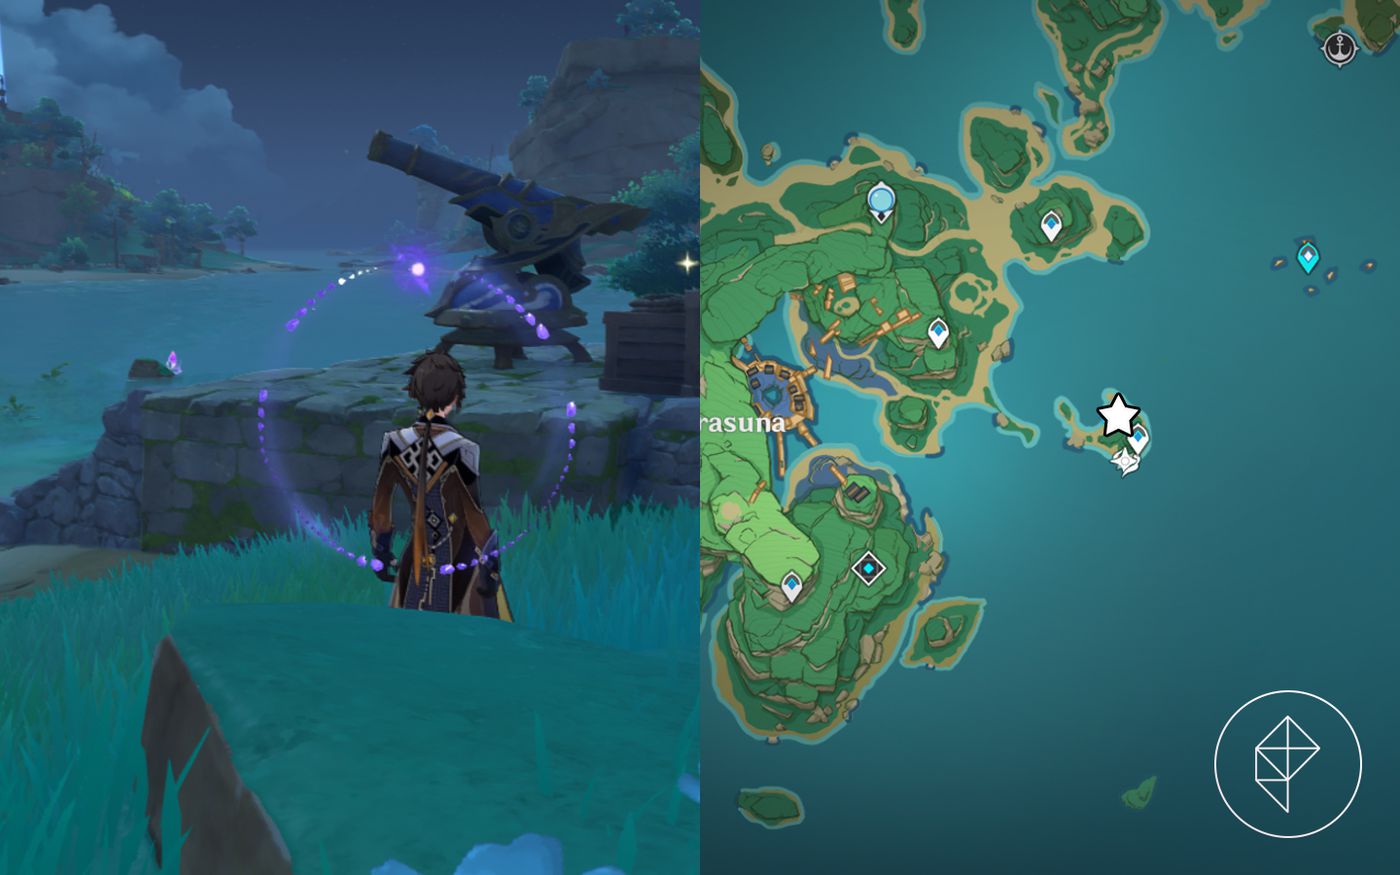
You’ll want to use the cannon to shoot the rubble away. When you’re ready, press “A”, and aim at the center of the rubble pile. As soon as you see the red shot counter start to count down, pull the trigger. Aim carefully and make sure you don’t miss.
Once you’ve successfully destroyed the rubble, look up at the sky to see the giant boulder fall into place. Congratulations, you’ve completed the quest.
Success If A Yellow Flash Appears
The most important thing to remember about the “yellow flash” is that it does not always mean you’re hitting the target. This is because there are many different types of explosions. Some are bigger, some smaller, some louder, some quieter. And each type is accompanied by a unique color that indicates where you hit the target. There are three main colors: red, blue, and green. Red means you missed completely; blue means you hit the center of the target; and green means you hit the edge of the target. In addition, there is a yellow flash. You know what that means.
Yellow flashes come in four different sizes: small, medium, large, and extra large. Small ones indicate that you hit the center of your target, while larger ones indicate that you missed completely. Extra-large ones indicate that you hit one side of the target. So how do you tell the difference between the different kinds of flashes? Here’s a quick guide:
1. Large/Extra-Large Hit the edge of the target
2. Medium Hit the middle of the target
3. Small Miss completely
4. Green Center of the target
5. Blue Hit the center of the target
6. Red Miss completely
7. Yellow Extra-Large Hit one side of the target
8. Orange Extra-Large Hit both sides of the target
9. Purple Extra-Large Hit the entire target
10. Black Completely miss the target
Leave a Reply